 |
| build your own pottery barn kids kitchen |
These are designed to be built out of mdf. The same thing the pottery barn ones are made out of. Using the Kregjig system to assemble.
We are in the process of building ours so I should have finished photos up soon, along with links and info on where I got the little accessories to finish out the build.
Quick tips: To mimic metal make sure you sand down all the sharp edges some. Some we even used a router.
Fridge

Fridge build assembly step 1.

Start by assembling the tops bottom and sides. If you don't want to dado your shelves you can just cut to the inside measurement and kreg jig your shelves in place.
tip: place your kreg joints toward in inside and bottom so they are hidden.

Next slide your shelves in or kreg jig in place.
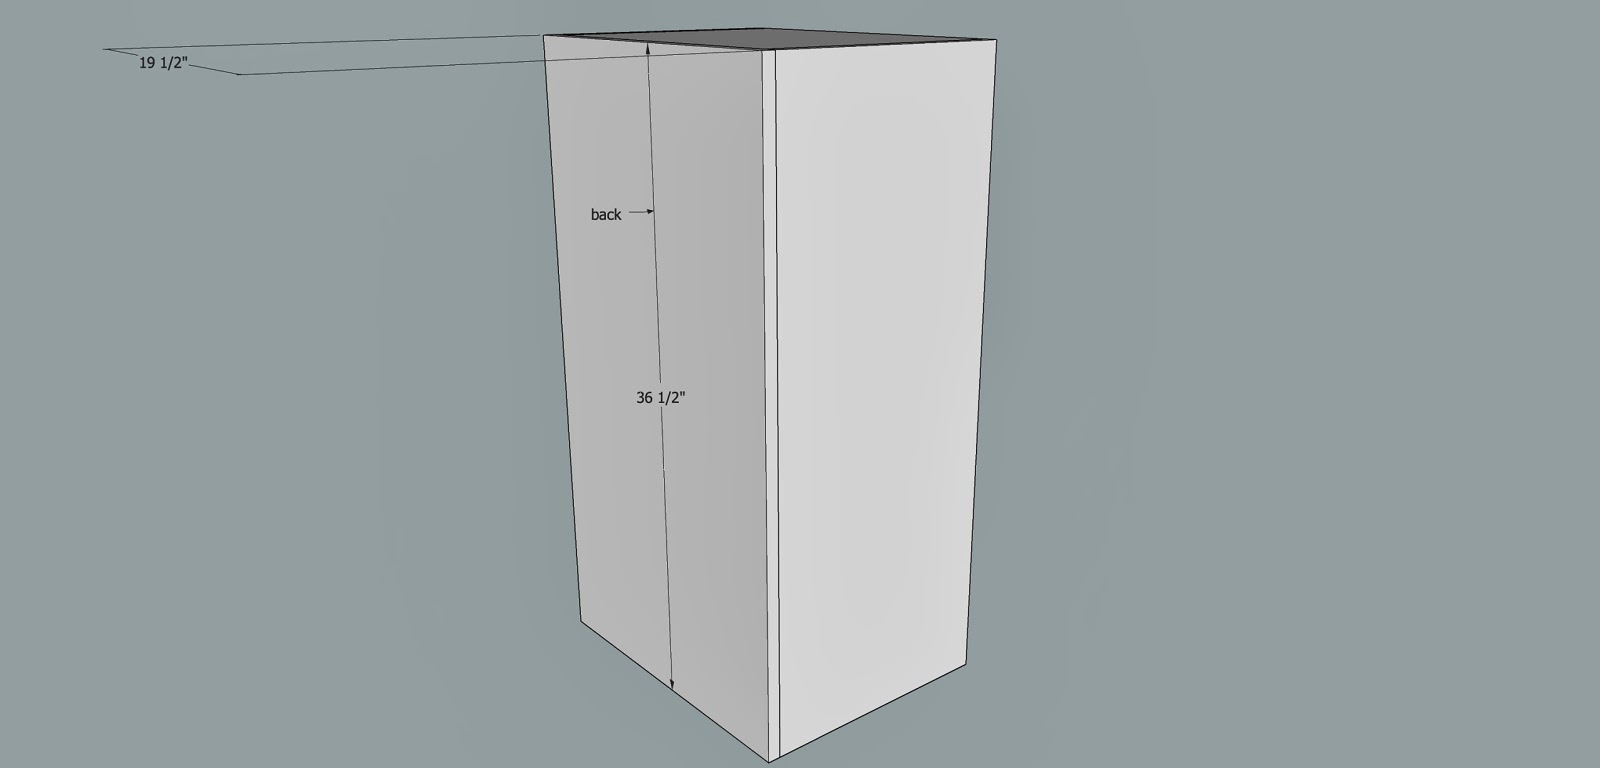
attach your back

Install your doors with hinges on left side.
Tip: to mimic the roundness of metal we used a 1/2 round over bit and did a half bullnose on the door edges.
Stove

Start with the stove back. Start by cutting your rectangle then draw out your curved top and cut it out with a jig saw.

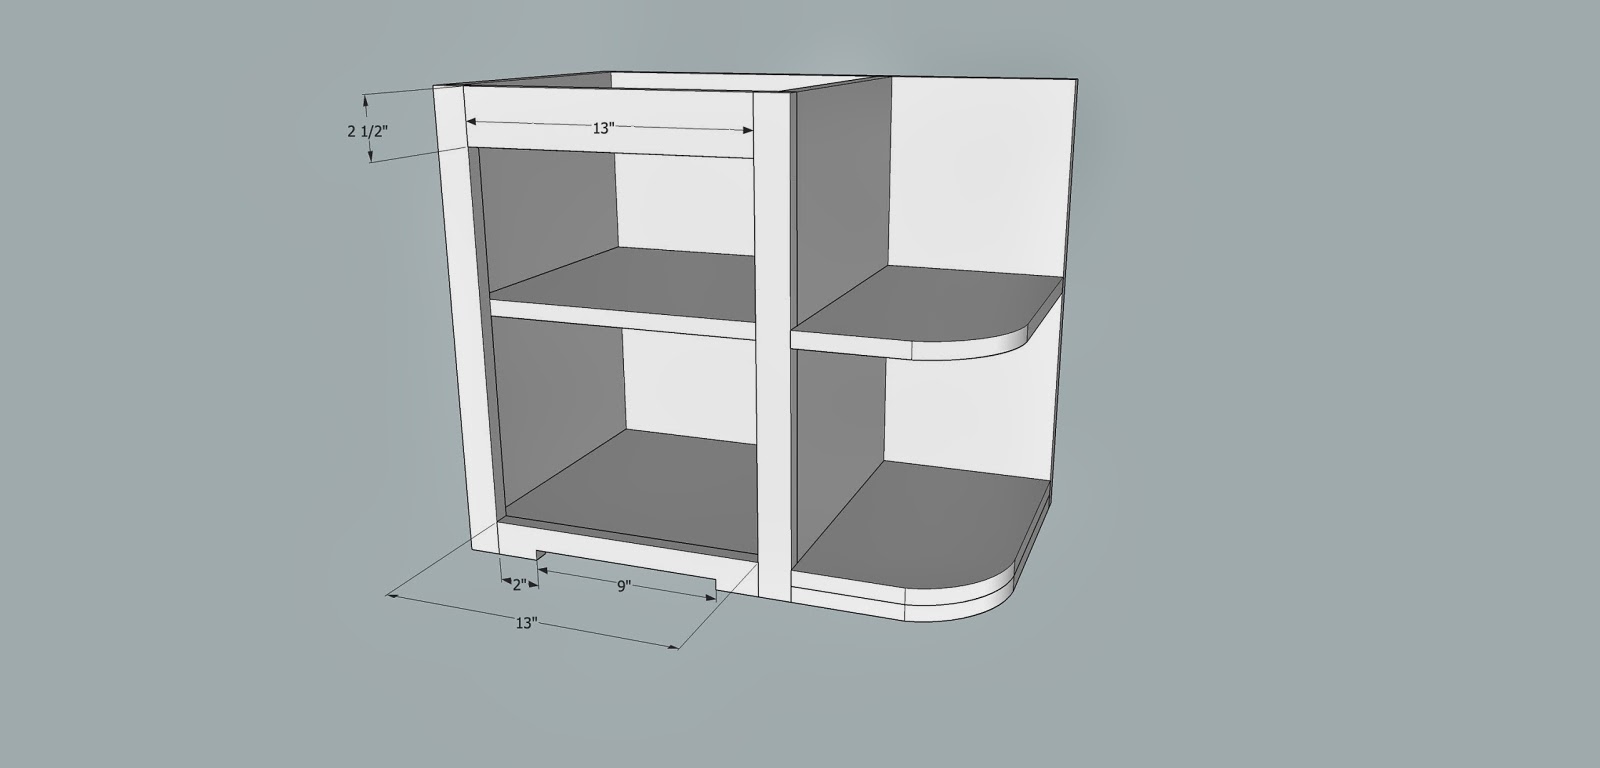
Next attach your sided and middle divider.

add your shelves.. in the smaller space our drill wouldn't fit to attach our kreg screws you can try a right angle drill or my husband used a ratchet and hand tightened.

Add front trim pieces. We routed the outter edges to mimic pottery barns..

Add top and bottom trim pieces..

add stove top. Cut your circles to fit your burners..

lastly add your doors. You will have to cut them a little smaller than what is written to allow for closure. Then make sure you inset your hinges some.
Sink

Start with back. then attach sides. Nest attach bottom. We cut a design out on the left side bottom the same as the front bottom profile. see photos later down.

add in your shelf.

add your front trim pieces these can be glued and nailed in place.

this parts a little more tricky follow the measurements and cut out your profile on a template..save your template to make your other shelves and tops. If you cant do the rounded edge you can always do them square. Just looks more retro with the rounded edge.
add your top and bottom trim.

add your top you can keep the same profile just add an inch to the back and to the side.

Add your doors. inset your hinges..

add your backsplash. first cut a rectangle then cut out your design.

cut your sink to what ever size you have for the insert.
whooooo your all done!
paint and other tips will be covered in reveal post.


.jpg)
